Cricut Weld vs Attach, which should you be using and why? Cricut Design Space has so many useful features, with Weld and Attach being two of the most useful.
But they often get confused. Weld and Attach are two completely different tools and both do very helpful things. Lets dig into the nitty gritty of these two tools.
Cricut Weld Explained
The Weld tool is used to join different shapes or text together. It is great for joining cursive letters together or groups of shapes to create one big shape.
Things To Remember When Using Cricut Weld
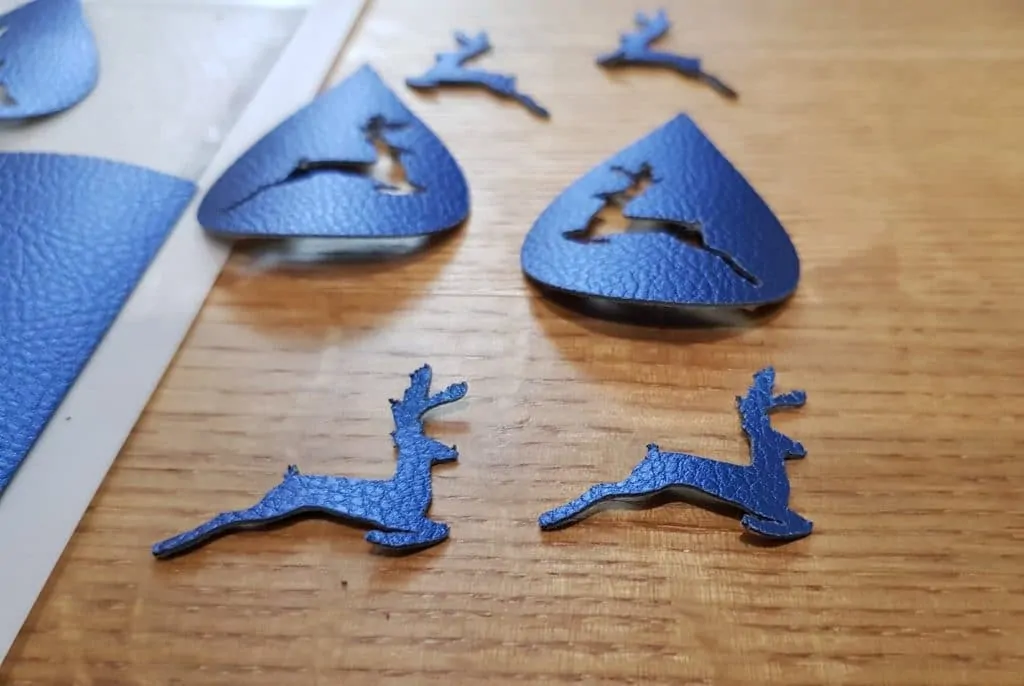
Welding Shapes
If you are joining shapes together, for example stars, the stars must overlap each other for the weld to work. Once you weld the stars together they will all become the same color. See below:


Welding Shapes Within Groups
If you have a group of shapes, you can choose just a few shapes within the group to weld together, and not all the shapes.


NOTE: The welded shapes will no longer be a part of the group once you have clicked weld.
Welding Cursive Letters
If you want to weld the letters of a cursive font together, you must also make sure the letters overlap as with shapes. Use the letter space tool to move the letters closer together until they overlap.
Then click Weld, and your letters will be merged together. Welding eliminates the unwanted cut lines that are there when you overlap cursive letters.

How To Un-Weld
This is an important point. You can un-weld your design at any time by clicking on the undo button repeatedly until the shape or word is un-welded.
BUT: If you save your project, you will not be able to un-weld after saving, so make sure you are happy to save your welded design or you will have to start from scratch again.
Welding A Design You Bought From Someone Else
You can also use weld if you have bought an svg design from places like Cricut, Etsy or an independent designer (like me ).
For example, if you are making a t-shirt or a custom wine bag, and are only using one color of HTV (heat transfer vinyl) for the whole design. Simply select all the layers of the design and then click weld


Cricut Attach Explained
The Attach tool in Cricut Design Space is used to keep things together. Have you noticed that sometimes when you click the make button, everything is jumbled up on the mat?
This is because Design Space is extremely clever at calculating and maximizing the use of space on the mat so that you use the least amount of HTV, vinyl or card for your project. No wasting precious materials with Cricut 🙂
However, we often want every layer of our design to stay exactly in place, as mentioned above in the Weld section, to keep a design the same as you laid it out.
This is particularly useful if you are using the score tool. In the below example, I am making a card that has a scored heart detail around a red heart with red text above it.
There is also a score line down the center of the card to make folding it easier and look more professional.

In the above screenshot, I used the Attach tool to attach the scored heart, scored card spine line and the rectangular shape together.
Once you click attach, you will see that they are now grouped under Attach in the right hand layers panel.
NOTE: Make sure the score lines are layered on top of the rectangular shape when you attach them, you can check this in the layers panel on the right hand side.
This applies to any project where you use the score tool. When you attach items, they all adopt the same color.
I want the red text and heart to stay red and aligned, as I will be cutting those out of adhesive vinyl and then sticking them onto the card.
I will use the weld tool to do this. This keeps them the same color and correctly laid out, so I can place them perfectly on top of card when applying them

How Weld And Attach Work Together
Cricut Weld and Attach can also be used in conjunction as shown in this tutorial. This enables us to create even more creative and intricate designs.
Because you cannot attach more than one set of layers within a design, I had to use weld in conjunction with attach in this tutorial.
For this project, I am not able to attach the score lines and rectangle shape and then also create a separate attachment of the just the red heart and text. I had to use weld for the heart and text. This is a great example of how Weld and Attach work together.
Happy Welding and Attaching! If you found this tutorial useful, please share it so it benefits other Cricut crazy people like us 🙂
Share the love…