How To Convert SVG Files To FCM Files
 As a designer, I get lots of questions from customers about cut files… how to use them, how to convert them and for help when the files won’t do what they’re supposed to!
Although I’m a Cricut Girl at heart, and I don’t own a Scan N Cut, I’ve been asked by quite a few readers and customers how to convert SVG files to use in their Brother Scan N Cut machines.
You CAN use svg files in the new Scan N Cut 2 machine, but the original machine doesn’t allow you to, and requires you to put files onto a USB and plug the USB into the machine. If you’re reading this though, I’m sure you are very well aware of this 😉
Fortunately, it only takes a few quick steps to convert your SVG file into an .FCM, so here goes (with pictures):
STEP 1:
Log into your Scan N Cut Canvas Workspace

STEP 2:
Click “New” to create a new project.

STEP 3:
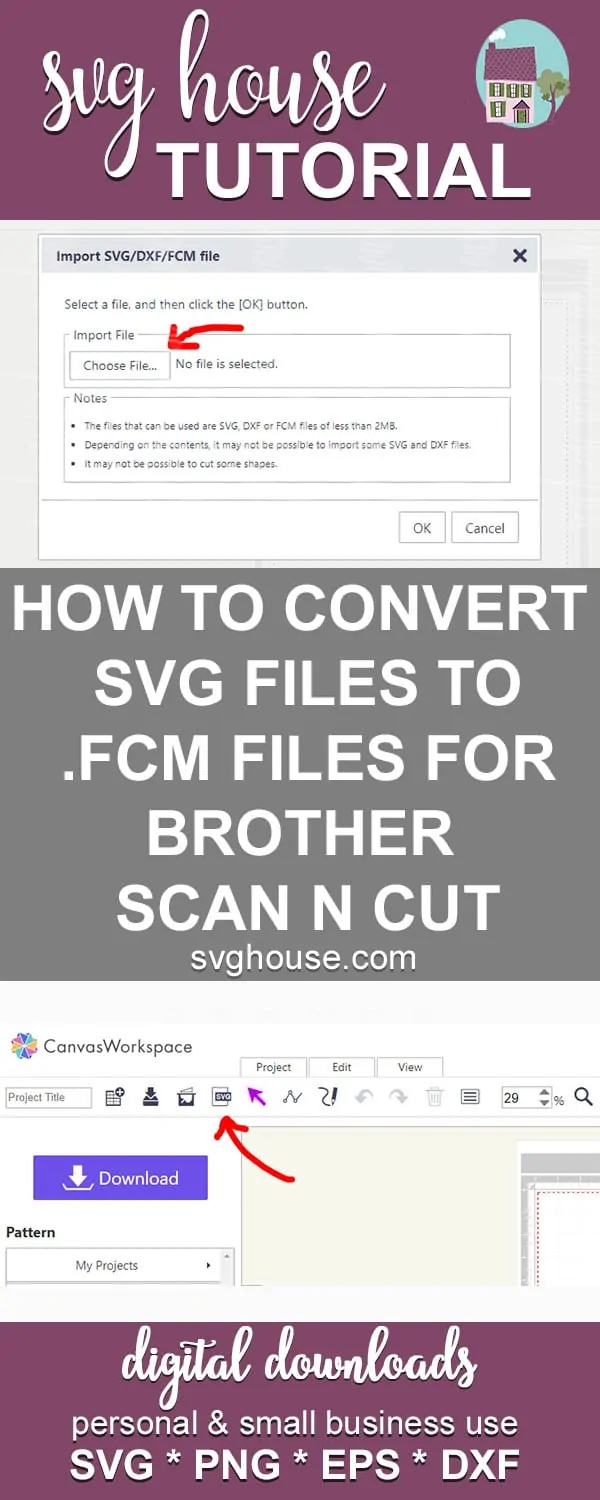
Click on the SVG button…

and then click “Choose File” from the pop up window.

Now navigate to the folder you have saved your SVG, select it and click open. For this example we are using one of my most popular designs, Simply Blessed SVG.
STEP 4:
Once you have your svg open in the Canvas Workspace, you should see something like this:

Now click the purple download button the left of the design:

This opens another pop up window, where you will see a button with a purple arrow that says
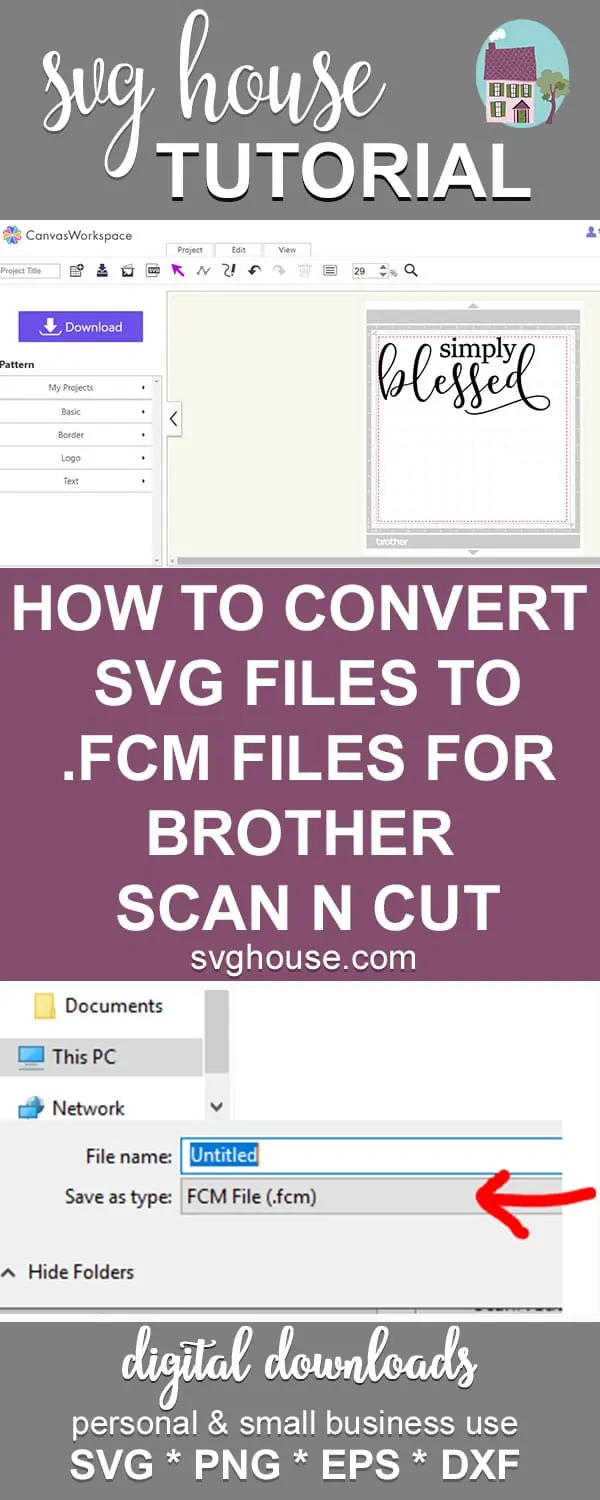
“Download to PC”. Click this button, then navigate to the folder you want to save your .FCM file to:

It will automatically save the file as an .FCM. Choose a name for your new .FCM file, otherwise it will save the file as untitled and this will be confusing when you’re trying to find it later on.

In this example, I am saving it as Simply Blessed, so I know exactly which design is on it:

Woohoooo! You did it! Great job! Now you can add this file to your USB, plug it into your machine and get on with the really fun stuff! Being Creative!